

2023


How might we create a solution for experienced facilitators that empowers them to improve engagement and foster inclusivity for effective brainstorming sessions?
We created two new features, Focus Mode and Sandboxes, in Microsoft Whiteboard for facilitators to improve engagement and foster inclusivity for effective brainstorming sessions.
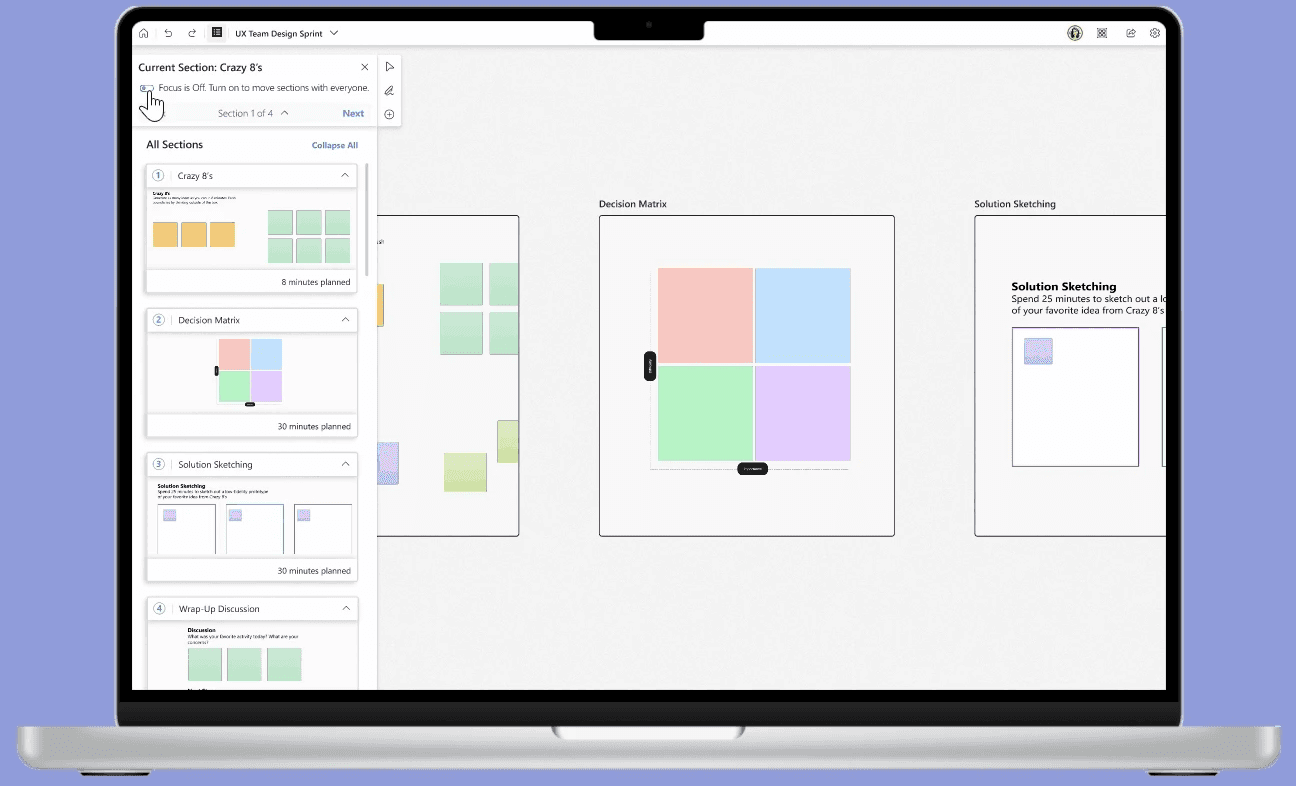
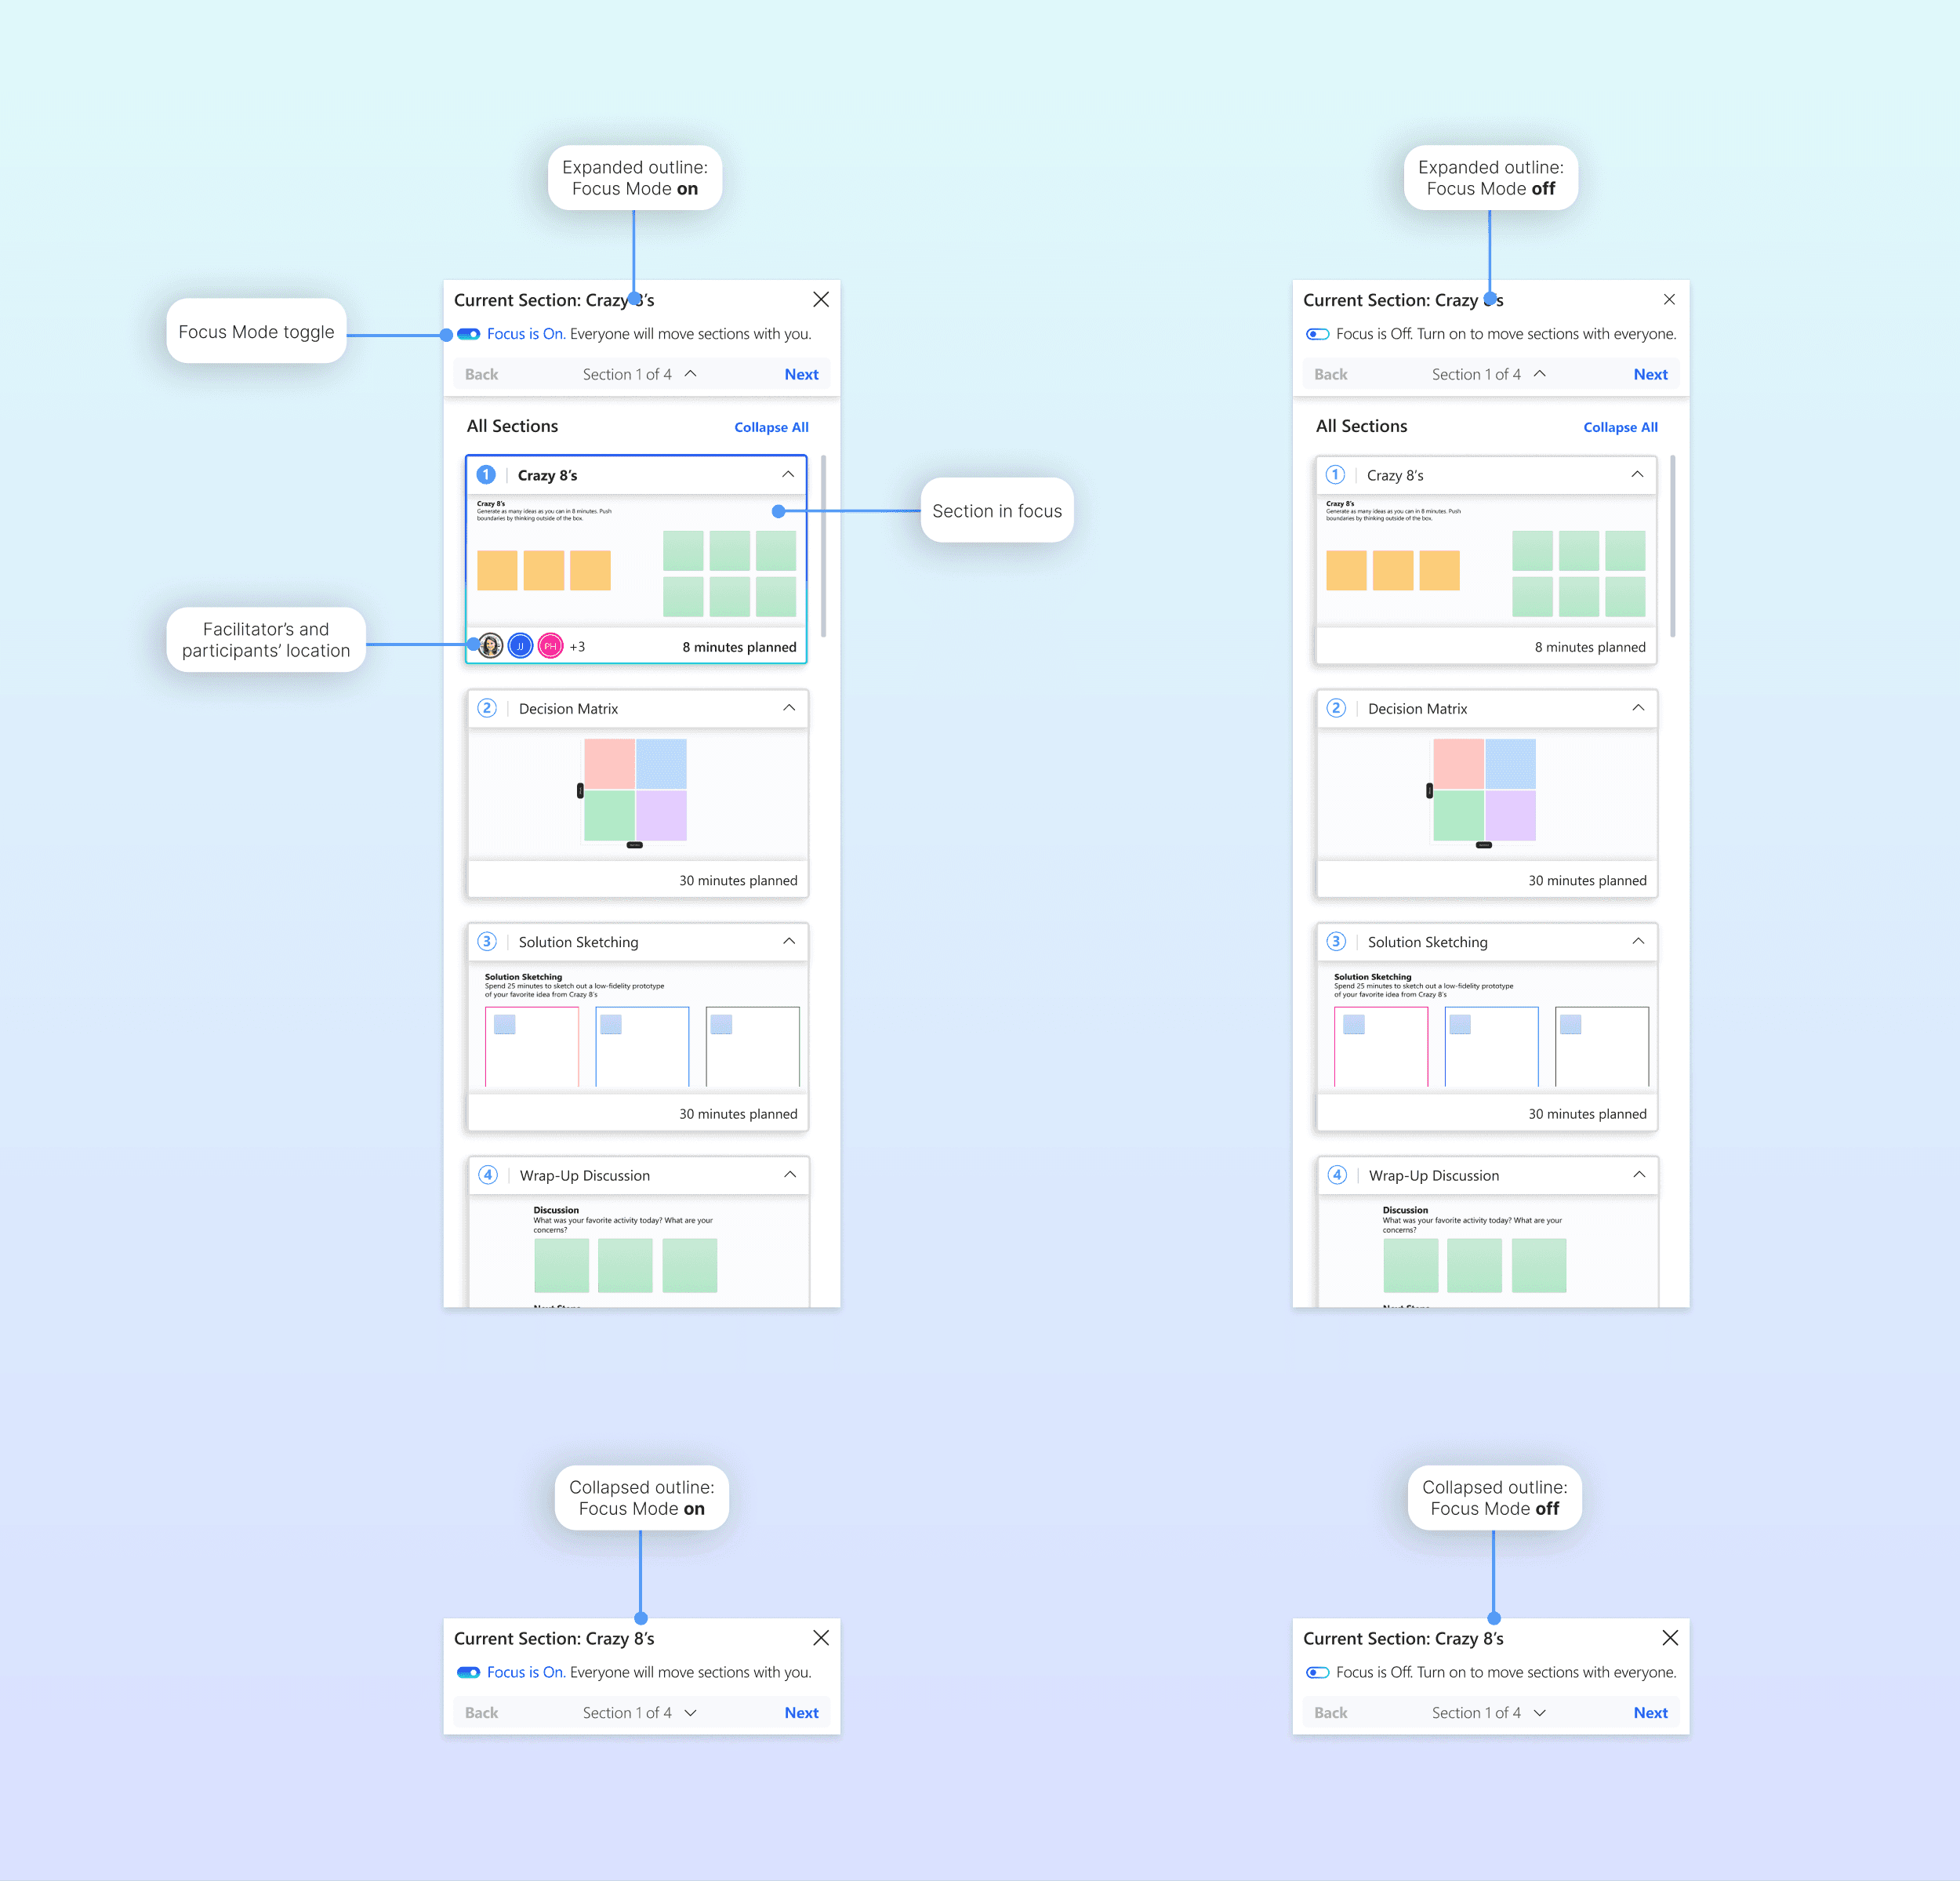
The facilitator views the structure of a brainstorming session in an outline format. With Focus Mode on, the facilitator can guide their participants through activities. The goal of this feature is to maximize focus and minimize distractions.


Sandboxes are breakout workspaces that the facilitator can create for certain types of activities or ideations where it is important for participants to have their own space and privacy to generate ideas. The goal of this feature is to provide a safe space for participants to work in cases when a large, open-canvas can be distracting, overwhelming, or counterproductive.


Design Process
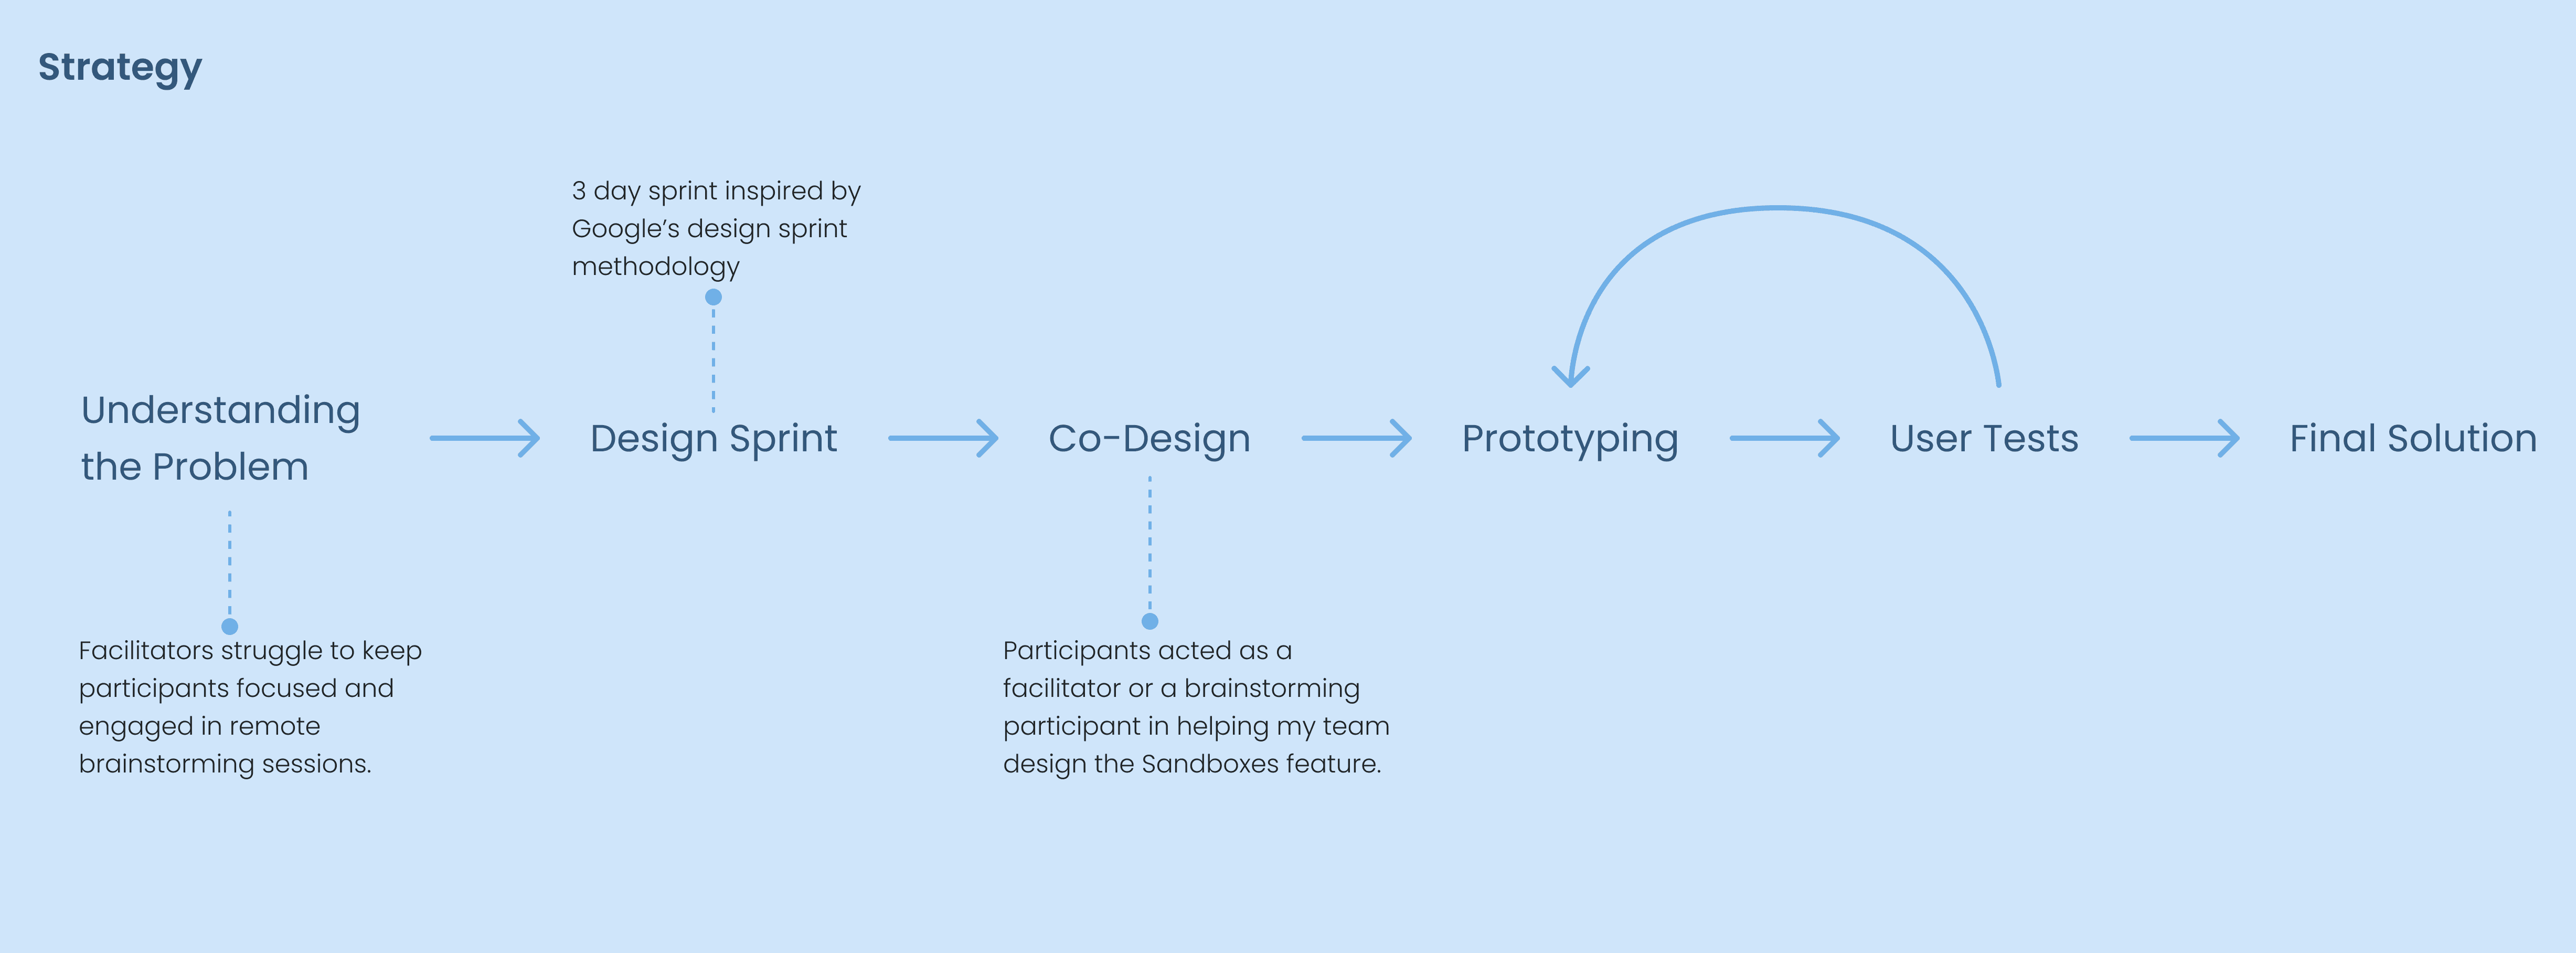
Expand full process ↓